
You lift your dog's paw and find nails curling sideways, clicking across the floor, or pressing into the pads. The instinct is to cut them back to normal immediately, but that's exactly where many owners get into trouble. With severe overgrowth, the quick, the living tissue inside the nail, has often extended toward the tip, so a dramatic trim can cause pain and bleeding.
Learning how to cut overgrown dog nails safely means treating correction as a gradual project. You'll remove a very small amount, allow the quick to recede, and repeat the process until the nails reach a healthy length. The safest result usually comes from patience, good lighting, controlled handling, and knowing when home trimming has stopped being the right option.
Table of Contents
- What Makes Overgrown Dog Nails Different
- Choosing Between Clippers and Grinders
- Setting Up Your Dog and Your Workspace
- Finding the Quick in Light and Dark Nails
- The Gradual Trim Protocol Week by Week
- When a Grinder or Professional Is the Better Call
- Troubleshooting Quick Nicks, Fear, and Curled Nails
What Makes Overgrown Dog Nails Different
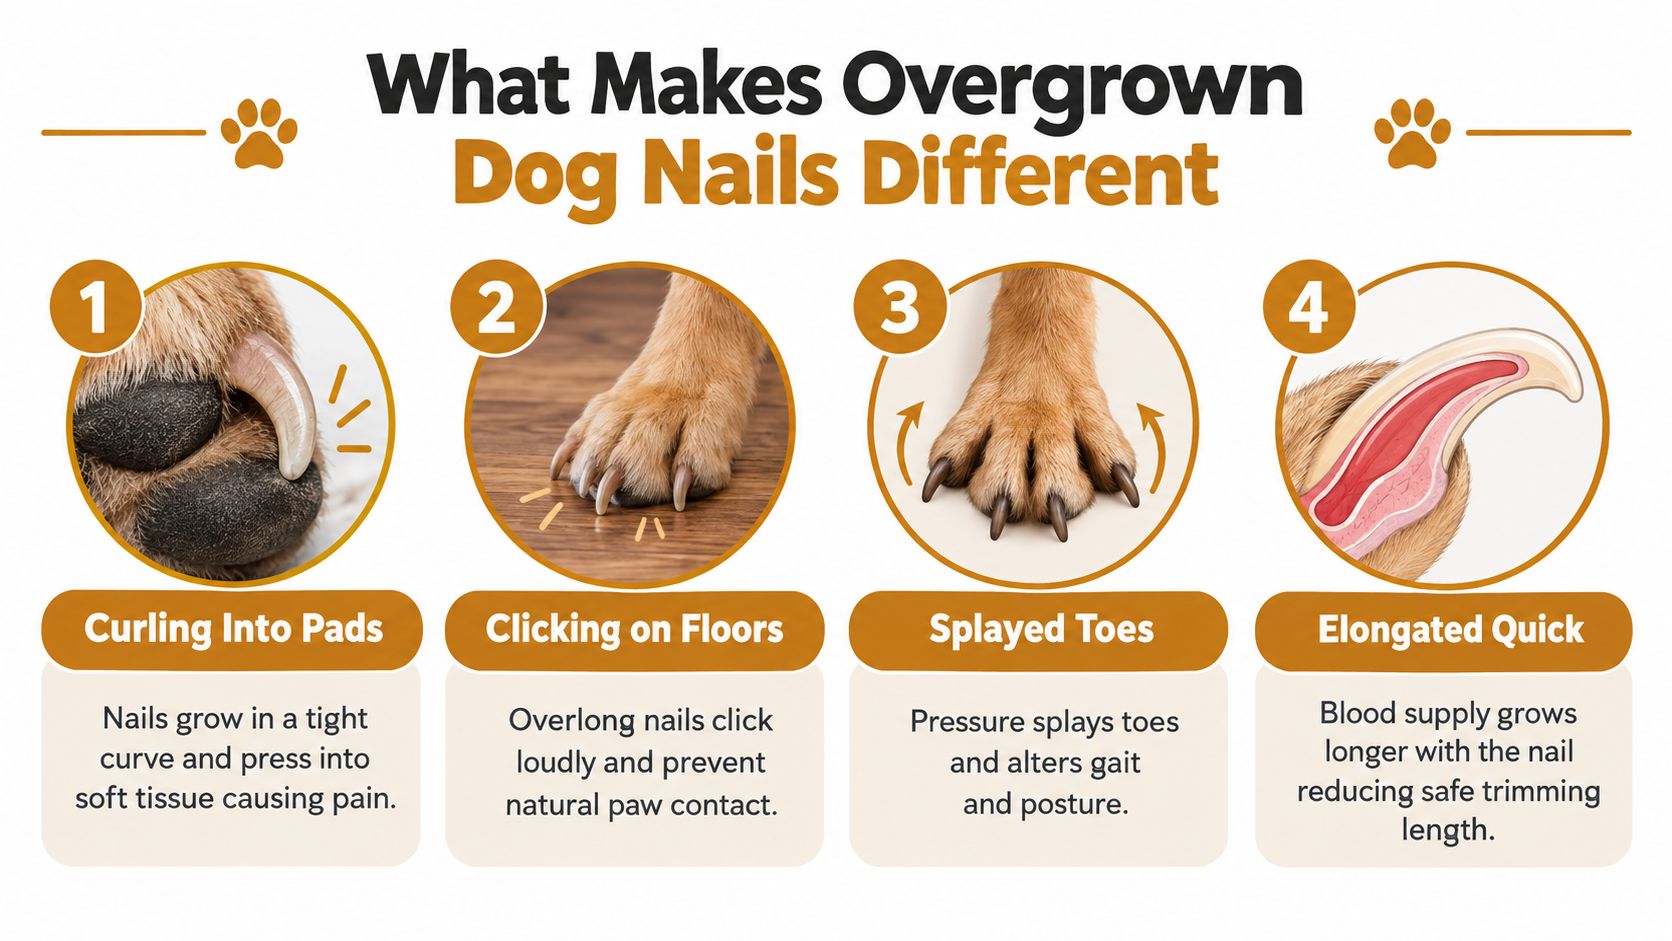
A dog may arrive from a shelter, miss grooming for a long period, or resist every earlier trim. The signs are easy to spot: nails click on hard floors, curl toward the paw pad, catch on rugs, or push the toes apart. These changes affect more than appearance. A long nail acts as a lever beneath the toe, altering foot placement and potentially causing discomfort while the dog stands or walks.
The hard outer shell is the part you remove. Inside it sits the quick, which contains blood vessels and nerves. As the nail stays long, the quick can extend toward the tip, leaving little safe material to cut during one session. Rover's veterinary-backed nail guide explains why repeated small trims are safer than one deep cut.
The anatomy that changes your approach
The dewclaw, higher on the inside of the leg, often misses contact with the ground. It can therefore become especially long or curved when routine checks focus only on the main nails. Check it as part of every paw inspection.
A slightly long nail may tolerate a normal trim. A curled nail, one touching the pad, or one pushing the nail bed upward requires a staged plan. Remove only 1–2 mm per nail, then wait about 5–7 days before checking and trimming again, allowing the quick to recede gradually. Dogs Trust's nail-care guidance supports repeating small corrections over several weeks instead of attempting one aggressive cut.
Practical rule: Severe overgrowth is usually a multi-week project, governed by quick recession rather than a single successful trim.
Dark nails require the same restraint because the quick may be difficult to see. Light nails make its position easier to judge, but neither color makes a large cut safe. Dogs with substantially curled nails, altered toes, or painful nail beds may need professional handling. For breed-specific paw structure and grooming context, see the American Water Spaniel breed profile.
Choosing Between Clippers and Grinders
The right tool depends on nail thickness, color, coat, and your dog's response to sound or vibration. None removes the need for small, staged cuts. A grinder offers gradual control, but holding it on one spot can still injure the quick.
| Feature | Guillotine Clippers | Scissor Clippers | Rotary Grinder |
|---|---|---|---|
| Control | Fast, but less forgiving on thick curves | Strong cutting force and clear cutting direction | Excellent for gradual shaping |
| Noise | Usually quiet | Usually quiet | Audible vibration can frighten anxious dogs |
| Nail thickness | Best for thinner nails | Better for thick or curved nails | Suitable for thick nails when used carefully |
| Learning curve | Simple, but crushing is possible | Requires steady hand position | Requires practice with angle, pressure, and heat |
| Best match | Small to medium dogs with thinner nails | Large dogs or heavy claws | Dark nails and owners comfortable with gradual sanding |
Guillotine clippers suit small to medium dogs with thin, light-colored nails. They may crush thick claws instead of slicing them cleanly. Scissor-style clippers, including Millers Forge-style tools, usually provide better cutting force for large breeds and curved nails because their jaws compress the nail from both sides. Owners comparing paw size and tool access can also consult the small-dog breed category.
A Dremel-style grinder with a sanding band helps when the quick is difficult to see. It removes material gradually, so you can stop after each small change and reassess the nail. Heat is the main trade-off. Keep contact intervals to 10–15 seconds to reduce thermal injury, as technical nail-care guidance advises. Royal Veterinary Center's nail-care instructions also emphasizes shallow angles and very small cuts.
Grinders work well for dark nails because sanding exposes the cut surface a little at a time. They are less suitable for dogs that panic at vibration, or for owners who cannot keep the tool moving. Long hair can catch in the sanding band, so secure the hair before starting.
Choose sharp scissor clippers and keep styptic powder or a styptic pencil nearby, even when a grinder is your main tool. For severely overgrown nails, the tool only changes how material is removed. The quick still needs time to recede, so plan several short sessions rather than attempting one aggressive trim.
Setting Up Your Dog and Your Workspace
A controlled setup matters as much as the cutter. Choose a calm room without other pets, use bright natural or directional light, and angle the light across the nail rather than directly down onto it. Side lighting can make the quick easier to identify in translucent nails and helps you see the cut surface on dark nails.
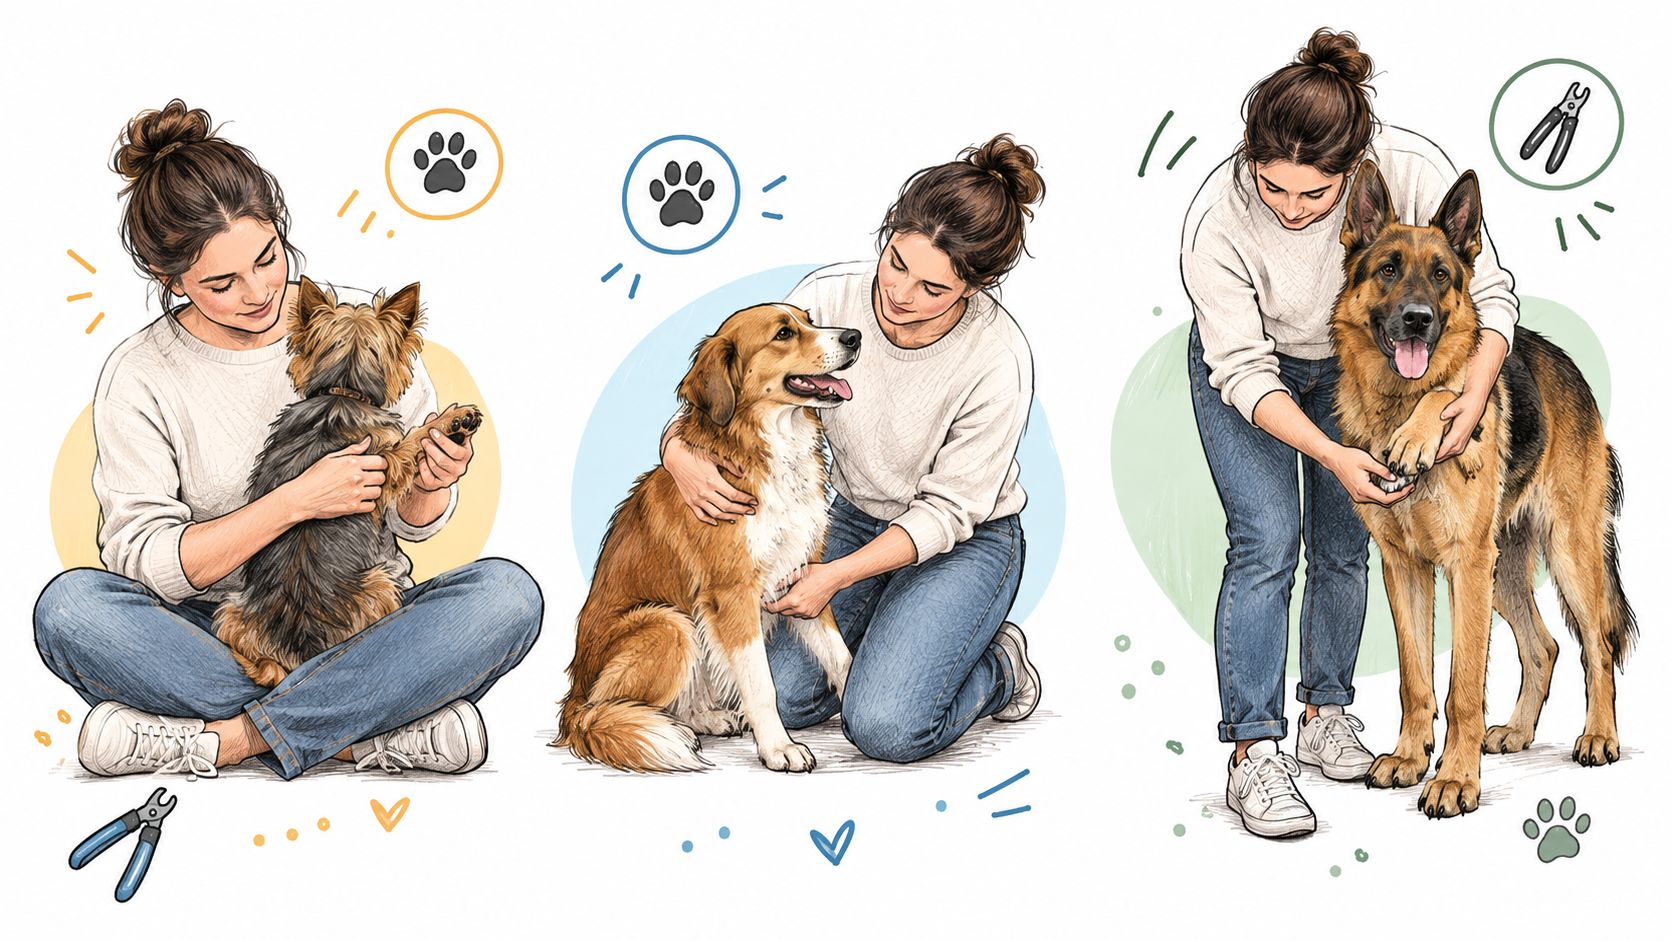
Place your dog according to size and stability:
- Small dogs: Sit with the dog facing away from you and rest the dog on your lap. Lift one paw from behind, keeping the elbow and wrist supported. A loose towel wrap can help a wiggly small breed feel contained without pinning the body.
- Medium dogs: Sit on the floor with the dog's hip against your thigh. Place one arm over the shoulders to prevent sudden turns while the other hand handles the paw.
- Large dogs: Use a non-slip mat or a stable raised surface around chest height if your dog is comfortable there. A second handler may be needed for a giant breed, especially when the nails are painful.
Holding the paw without creating a struggle
Use the hand closest to the paw to stabilize the wrist. Place your thumb on top of the paw pad and your index finger beneath the toe pad. Apply a gentle squeeze to extend the nail, but don't pull the toe forward. Your other hand should guide the tool while the wrist remains supported.
Keep treats within reach, but deliver one after each nail or each calm handling step, not while the dog is actively pulling away. That timing teaches the dog that cooperation ends the procedure.
If the dog is struggling hard, stop. Force turns a difficult trim into a lasting fear response and makes a quick nick more likely.
For a visual demonstration before you begin, use this dog nail-trimming video. Owners of curly-coated dogs can also review the Poodle breed page when considering how coat length may affect grinder safety and paw access.
Finding the Quick in Light and Dark Nails
The quick is the living core of the nail. It contains nerves and blood vessels, and it becomes longer as an overgrown nail remains extended. That's why the end of a neglected nail may look hard and hollow while the safe trimming zone has become very short.
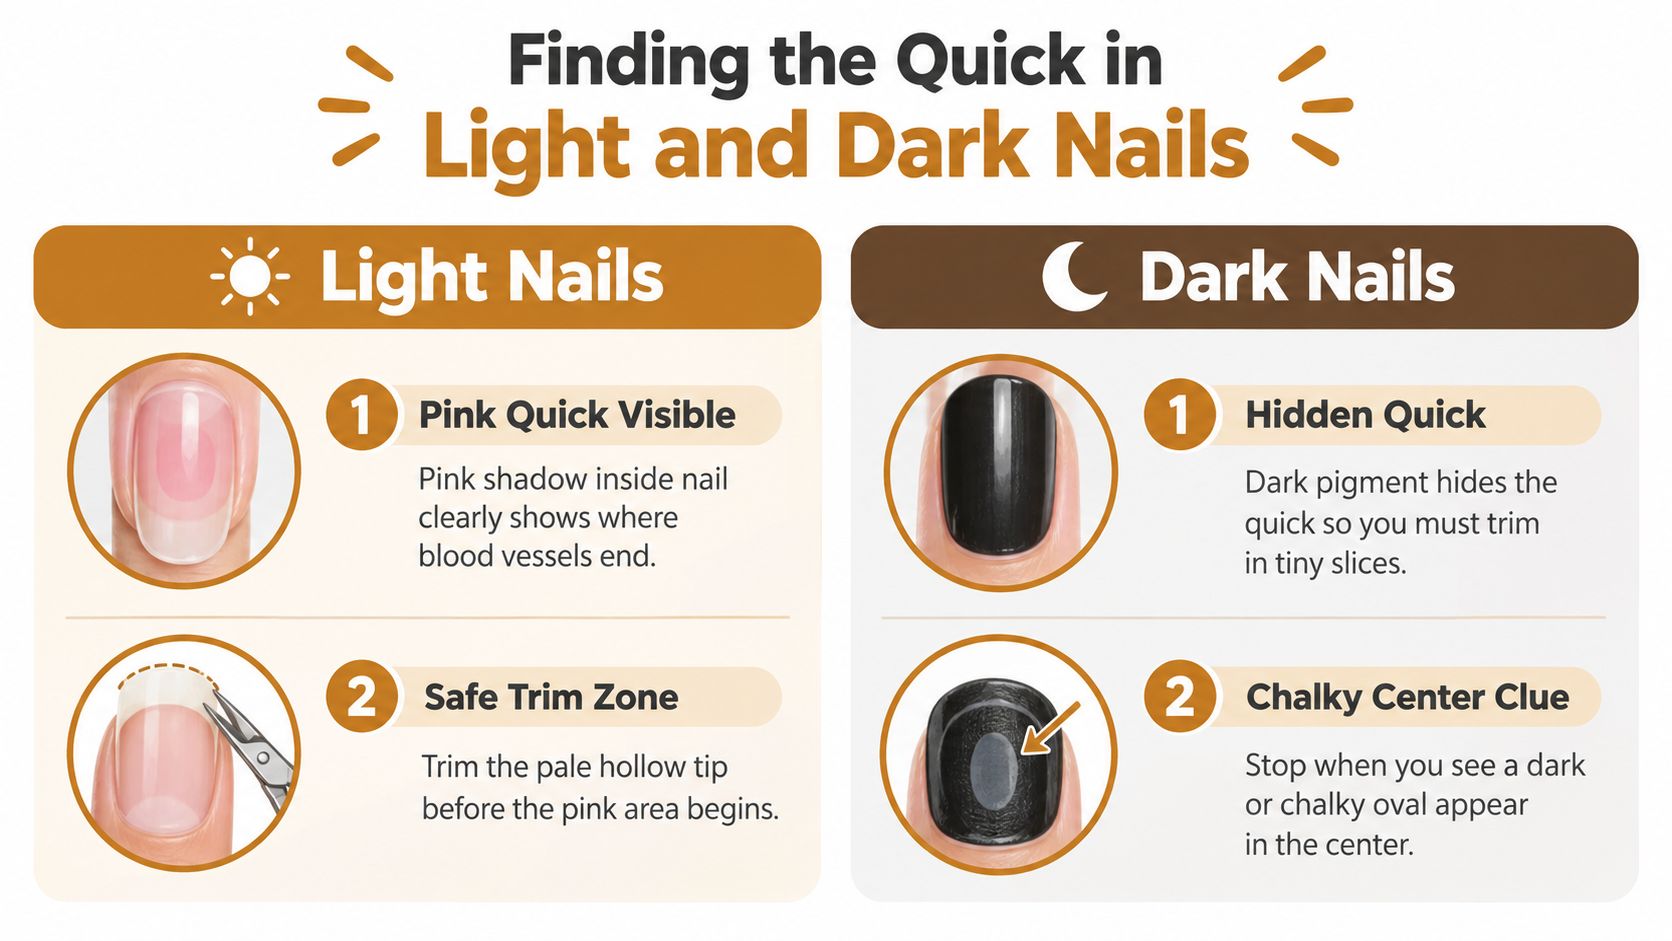
Light nails are easier to read. Look through the pale outer shell for a pink internal area. Trim only the hollow material ahead of that pink core, keeping about 2 mm away from the quick, as recommended by veterinary guidance from Washington State University's veterinary teaching hospital.
Reading the cut face on black nails
Dark nails require a slower approach because pigment hides the pink quick. Take a 1–2 mm slice from the tip, then inspect the freshly cut surface before taking another. American Kennel Club guidance describes watching for a gray-to-pink oval or a small dark central spot as the cut approaches the quick.
A chalky white ring can also signal that you're nearing the living tissue. A dry, pale center generally means you're still in the hard outer material. A darker, moist-looking center means you should stop. The exact appearance varies with nail color and texture, so use several clues together rather than relying on one visual mark.
Cut at a shallow angle that follows the natural slope of the claw. Don't aim the tool straight across a strongly curved nail, and don't twist the paw to create a better angle. If you can't distinguish the cut surface, take less material or switch to a grinder under controlled conditions.
Owners comparing nail and paw differences across breeds can use the breed comparison tool to consider how size and structure may affect handling. When you're uncertain, stop and wait several days before removing another sliver. A cautious pause is safer than chasing a perfect length.
The Gradual Trim Protocol Week by Week
Overgrown nails are usually a multi-week project, not a single trimming session. The quick needs time to recede as the hard nail becomes shorter, so remove only 1–2 mm and wait 5–7 days before the next attempt. That pause allows the living tissue to move back gradually and reduces the chance of cutting into it.
A practical schedule
| Week | Session Goal | Amount Removed | Visual Check | Home Support |
|---|---|---|---|---|
| Week 1 | Handle paws and introduce the tool | 1–2 mm from the tip | Check the cut face | Reward calm handling and short contact |
| Week 2 | Repeat the controlled trim | 1–2 mm | Look for a chalky ring or central dot | Walk on suitable concrete if your dog is comfortable |
| Week 3 | Continue shortening without chasing normal length | 1–2 mm | Compare each nail with the previous session | Record the date and take a progress photo |
| Week 4 | Reassess length and comfort | 1–2 mm if safe | Stop before the quick | Continue low-pressure handling between sessions |
Make the first session deliberately uneventful. With your fingers supporting the paw and the tool held securely, handle each toe, show the clippers, and remove only a tiny tip while your dog stays relaxed. You do not need to finish every nail. A few calm, successful cuts build a safer routine than completing the entire foot and ending with panic.
Between sessions, comfortable walking on concrete may wear the exposed tip. Keep this secondary to trimming, and avoid it if the paws are sore or the surface causes discomfort. It will not shorten dewclaws, which usually do not contact the ground, but it may support progress on weight-bearing nails.
Track the change: Write the date beside each session or photograph the nails from the same angle. Comparing records makes small changes easier to judge.
Continue weekly sessions for several weeks, or longer when the overgrowth is substantial. Each time, stop before the quick rather than chasing a normal-looking length. Once the nails just clear the floor while your dog stands naturally, switch to routine upkeep every three to four weeks, adjusting for growth and activity.
When a Grinder or Professional Is the Better Call
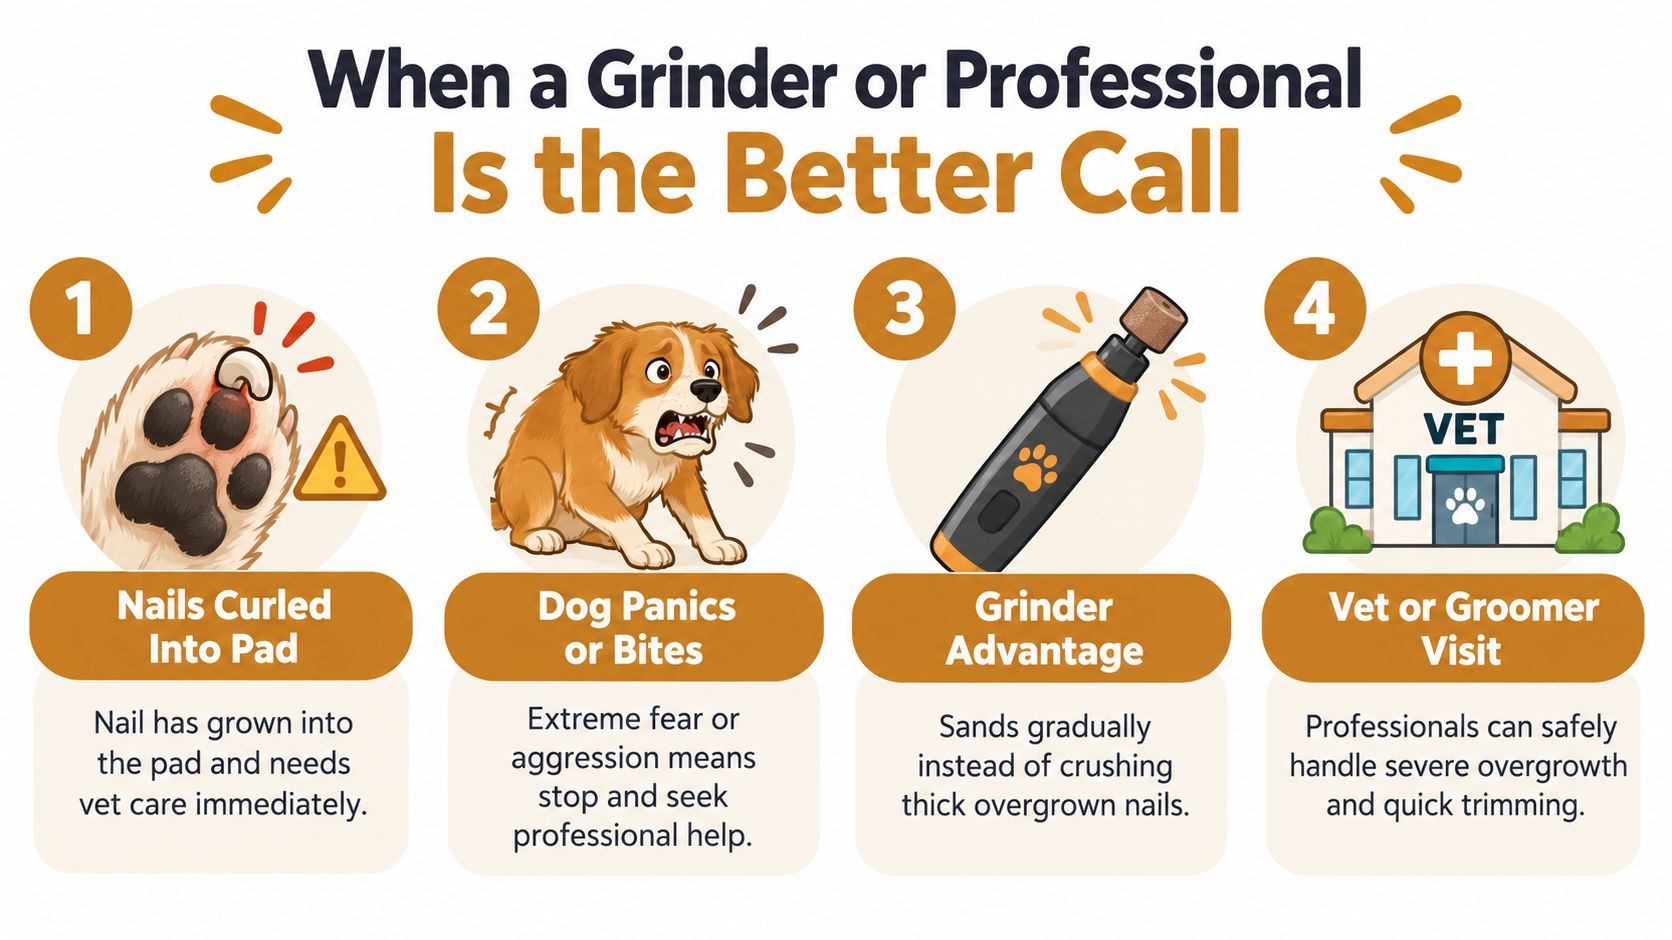
A grinder is useful when clippers crush the nail, the claw is twisted, or the quick cannot be judged confidently. Sanding removes a thin layer at a time, giving better control over an uneven surface and reducing the risk of one large cut. It still creates heat, however. Touch the grinder to the nail briefly, then pause and check the temperature before continuing.
The trade-off is behavior. Vibration and noise can frighten a dog that accepts quiet clippers, while long hair can catch in the rotating bit. Trim or secure feathering around the paw first. Introduce the running tool away from the foot, let your dog hear it briefly, and reward calm behavior before bringing it near the nail. Keep the first grinder session short, even if the nails remain too long.
Escalate before the situation becomes painful
A professional groomer is a sensible choice for thick-coated or double-coated dogs, curled dewclaws, and dogs with a history of traumatic nail handling. A groomer can also establish a repeatable maintenance routine when your dog is physically healthy but difficult to position. This support is especially practical for owners managing a large-dog breed category and equipment that is hard to control alone.
A veterinarian should handle nails curled into the pad, visibly distorted toes, or nail beds that appear infected. Veterinary care is also appropriate for nails growing at odd angles, brittle nails in diabetic or senior dogs, or any dog whose pain makes handling unsafe. Bleeding is a recognized complication of nail trimming, including in professional settings, so a confident handler still needs styptic powder, steady restraint, and a clear stopping point.
Seek urgent veterinary advice when bleeding will not stop after five minutes, when swelling or discharge develops, or when the dog cannot bear weight. Do not choose a tool based on nail length alone. Curvature, pain, coat, temperament, and your ability to hold the paw securely matter more.
Professional help is not a failure of training. It is one stage of a safe, multi-week correction plan when pain, anatomy, or behavior makes home trimming unreliable. Overgrown nails usually cannot be restored in one session, because the quick must recede gradually as the exposed tip is shortened.
Troubleshooting Quick Nicks, Fear, and Curled Nails
A quick nick can bleed heavily because the quick contains blood vessels. Stay calm, apply styptic powder to the nail tip, and hold firm pressure. If styptic powder is unavailable, cornstarch can serve as a temporary alternative. ASPCA grooming guidance lists these materials as immediate first aid for minor trimming-related bleeding.
Stop cutting that nail for the session. Settle your dog, check the toe for a torn or split nail, and watch for bleeding that continues, increasing pain, swelling, or discharge. A clean cut that went slightly short differs from a cracked nail or damaged nail bed, which warrants veterinary assessment.
Fear changes the training plan
Whining, repeated paw pulling, a rigid posture, or snapping shows that the dog has reached its limit. Put the tool down where the dog can see it, scatter treats away from your body, and finish the session. On the next day, practise handling only. Reintroduce the tool in small steps once the dog remains relaxed.
Forcing a struggle teaches the dog that restraint predicts frightening pressure. It also makes your hand less steady and raises the chance of cutting the quick. Some dogs can progress one nail at a time. Others need a groomer or veterinarian to reset the process safely.
Managing curled and corkscrew nails
A curled nail hides the cutting direction, so expose only a small section at a time. A warm-water soak may soften the outer keratin, but it does not make the nail safe to remove in one piece. Take tiny slices along the curve, checking the freshly cut surface after each one. Do not cut beneath a tight curl if the tool would point toward the pad.
Nails that have grown into the pad, persistent toe swelling, foul odor, or limping lasting beyond a day require veterinary care. Trying to finish the correction at home can worsen an already painful injury.
The timeline depends on how far the nails have overgrown. Severe curls or changed toe position may require several weeks to months of gradual work, as noted earlier. The quick needs time to recede as the exposed tip is shortened, so one session rarely restores normal length. After safe shortening, maintenance trims every three to four weeks can help keep the quick from advancing again.
PetCostEngine helps US dog owners connect everyday care decisions with breed and state-specific veterinary planning through its data-driven guides and calculators. Visit PetCostEngine to explore your dog's breed profile, estimate ongoing care needs, and prepare for future veterinary decisions.
Modeled estimates for 226 breeds, with the formula and sources published in full.
See the data →
Joint supplement → Puzzle toys → No-pull harness →
As an Amazon Associate, PetCostEngine earns from qualifying purchases.